This past Saturday I hosted a few friends for the Etsy Craft Party. It was so much fun to get people together to just spend a few hours breaking away from our daily tasks to just relax and create some fun crafts.
We made a few smaller crafts like a picture frame and magnets, but my absolute favorite was the mobile that we made! So, I’m going to break it down step-by-step to show you how we made it so you can make one too!
Here’s what you’ll need:
- 8″ embroidery hoop
- 6-20″ pieces of thread
- 5 pieces of coordinating scrapbook paper
- 2″ circle hole punch
- glue stick
- washi tape
- baker’s twine
- scissors
- ruler or tape-measure

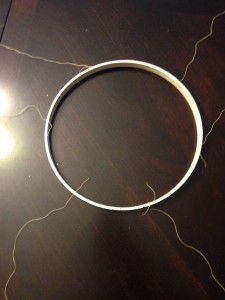
1. Cut your thread into 6 20″ pieces. This length of thread will allow you to place 5 circles on each strand of thread.  2. Separate the inside hoop from the outside of embroidery hoop and tie pieces of thread around the inner portion of the hoop. Make sure strands are all equally spaced around the inside of the embroidery hoop. Don’t worry about any pieces of the knot that hangs over the edge, we’ll snip those off later.
 3. Now we’ll set aside the hoop with the thread tied to it and cut out our pieces of scrapbook paper. For this project, you’ll need 5 coordinating pieces of scrapbook paper. From each piece of scrapbook, you’ll take your 2″ circle punch and cut out 12 circles.
  4. Next you’ll start gluing your circles onto the thread. Put glue on the back of one paper circle and place it under the thread, then put the coordinating circle on top of the side, sandwiching the thread between the back of each circle of paper. Repeat for all patterned circles on that strand.
 5. When you’re ready to move on to the next strand of thread, it’s best to line up the next thread beside the one you just completed to make sure you are spacing all of your circles out evenly.
  6. Once you’ve finished gluing all of your circles onto the strands of thread, you can place the outer hoop of the embroidery hoop back onto the inner hoop.
  7. Now you’re ready to cut the small strands out from the top of the hoop and from the end of the last paper circle.
 8. Next place your washi tape around the outside of you embroidery hoop to give it a little extra something. You could also paint the hoop before beginning the process if you wanted to add extra color to it.
 9. Finally, you’ll tie your baker’s twine across the top of the embroidery hoop to give you a way to hang it.
  And that’s it! Now you have your own easy, DIY mobile that you can add to your child’s room or your craft room!

See this post linked up at:


What a fun party and craft. I would love to do a craft party too. Thanks for sharing this on Merry Monday.